Automating Azure Deployments
I’m a pretty big fan of what Microsoft have been doing as of late with Azure. No matter what language you develop in there is something in Azure for you. They have done a good job of providing well sized application building blocks. I spent about a week digging into Amazon Web Services and Azure to help out with an application deployment at work. Overall they are both amazing offerings. When I’m explaining the differences to people I talk about how Amazon started with infrastructure as a service and are now building platform as a service. Azure started at the opposite end: platform as a service, and are working towards infrastructure as a service.
Whether one approach was better than the other is still kind of up in the air. However one area where I felt like Amazon was ahead of the game was in provisioning servers. This isn’t really a result of Amazon stepping up so much as it is a function of tools like Chef and Puppet adopting Amazon over Azure. Certainly Cloud Formation, Amazon’s initial offering in this space, is good but Chef/Puppet are still way better. I was a bit annoyed that there didn’t’ seem to be any answer to this from Microsoft. It wouldn’t be too difficult for them to drop 10 engineers into the Chef and Puppet teams to allow them to deploy on Azure. Then I remembered that they were taking the platform before infrastructure approach. I was approaching the situation incorrectly. I shouldn’t be attempting to interact with Azure at this level for the services I was deploying to websites and SQL Azure.
One thing about the Azure portal which is not super well publicized is that it interacts with Azure proper by using RESTful web services. In a brilliant move Microsoft opened these services up to anybody. They are pretty easy to use directly from Curl or something similar but you need to sign your requests. Fortunately I had just heard of a project to wrap all the RESTful service calls in nice friendly managed code.
In a series of articles I’m going to show you how to make use of this API to do some pretty awesome things with Azure.
Certificates
The first step is to create a new management certificate and upload it to Azure. I’ll assume you’re on Windows but this can all be done using pure OpenSSL on any platform as well.
Open up the Visual Studio Command prompt. If you’re on Windows 8 you might have to drop to the directory directly as there is no hierarchical start menu anymore.C:Program Files (x86)Microsoft Visual Studio 12.0Common7ToolsShortcuts.
In the command prompt generate a certificate using
makecert -sk azure -r -n “CN=azure” -pe -a sha1 -len 4096 -ss azureManagement
This will create a certificate and put it into the certificate manager on windows. I’ve used a 4096 bit key length here and sha1. It should be pretty secure.
- Open the certificate manager by typing
certmgr.msc
into the same command prompt.
- In the newly opened certificate manager you’ll find a folder named azureManagement. Open up that folder and the Certificates folder under it to find your key.
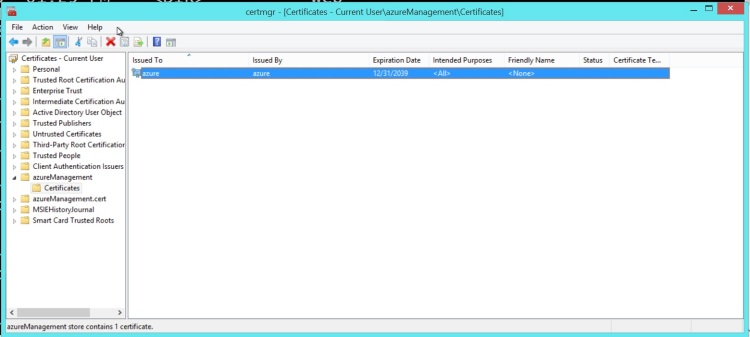 5. Right click on that key and select Tasks > Export
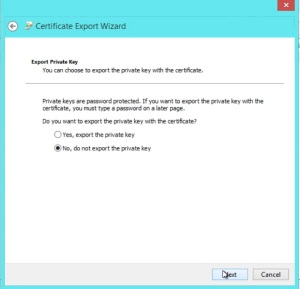
- Select “No, export a public key”
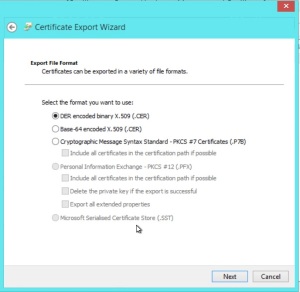
 7. In the next step select the Der encoded key
- Enter a file name into which to save the certificate.
You have now successfully created an Azure management key. The next step is to upload it into Azure.
In the management portal click on on settings
In the settings section select the Management Certificates tab.
Click upload and select the newly created .cer file.
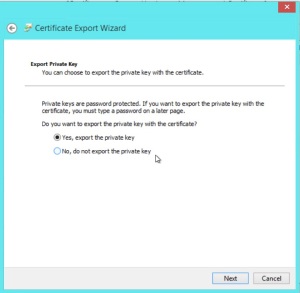
You now have the Azure half of the certificate complete. The next step is to get the client side of the certificate, a .pfx file, out. This is done in much the same way as the the private key, except this time select “Yes, export the private key”.
Right click on the certificate, select tasks then export
Select “Yes, export the private key”
- The default options on the next screen are fine
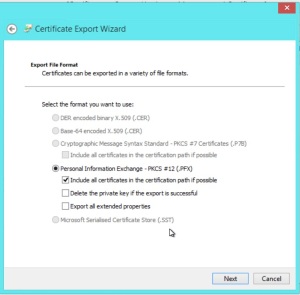 4. Finally enter a password for the pfx file. The combination of password and certificate are what will grant you access to the site.
Creating a Database
There is a ton of stuff which you can do now that you’ve got your Azure key set up and I’ll cover more of it in coming posts. It didn’t seem right to just teach you how to create a key without showing you a little about how to use it.
We’ll just write a quick script to create a database. Start with a new console application. In the package manager run
Install-Package Microsoft.WindowsAzure.Management.Libraries -Pre
At the time of writing you also need to run
Install-Package Microsoft.WindowsAzure.Common -Pre
This is due to a slight bug in the nuget packages for the management libraries. I imagine it will be fixed by the next release. The libraries aren’t at 1.0 yet which is why you need the -Pre flag.
The code for creating a new server is simple.
First step in the GetCredentialson line 21 is to load the certificate we just created above, the password for the certificate and the subscription Id. Next we create a new SqlManagementClient on line 30. Finally we use this client to create a new SQL server in the West US region. If you head over to the management portal after having run this code you’ll find a brand new server has been created. It is just that easy. There is a part in one of the Azure Friday videos in which Scott Guthries talks about how much faster it is to provision a server on Azure than to get your IT department to do it. Now you can even write building a server into your build scripts.
